Change Sets and Deployment in Production
Creating Changesets in Sandbox and Deployment to Production
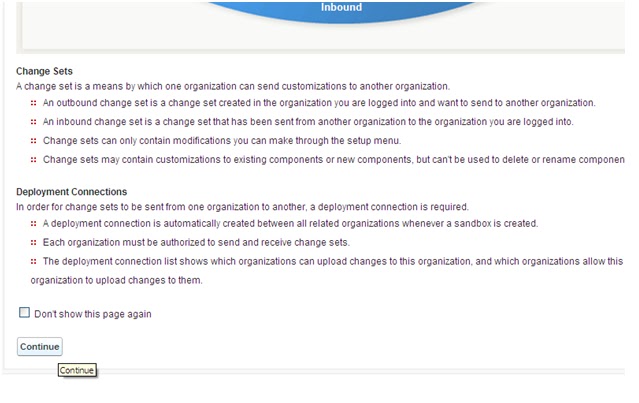
Change Sets
A change set is a means by which one organization can send customizations to another organization.
·  An outbound change set is a change set created in the organization you are logged into and want to send to another organization.
· An inbound change set is a change set that has been sent from another organization to the organization you are logged into.
· Change sets can only contain modifications you can make through the setup menu.
· Change sets may contain customizations to existing components or new components, but can't be used to delete or rename components.
Deployment Connections
In order for change sets to be sent from one organization to another, a deployment connection is required.
· A deployment connection is automatically created between all related organizations whenever a sandbox is created.
· Each organization must be authorized to send and receive change sets.
· The deployment connection list shows which organizations can upload changes to this organization, and which organizations allow this organization to upload changes to them.
1)UserMenu->Setup->App Setup->Deploy->Outboundchange Sets

2)Now click on “Continue” button.


3)Now Click on “Add” button to add Componets to changesets whatever you need to add to changeset and move to Production

4)See the following figure and selecting components such as Apex Classes,Apex Triggers,Custom Fields etc., from the drop down
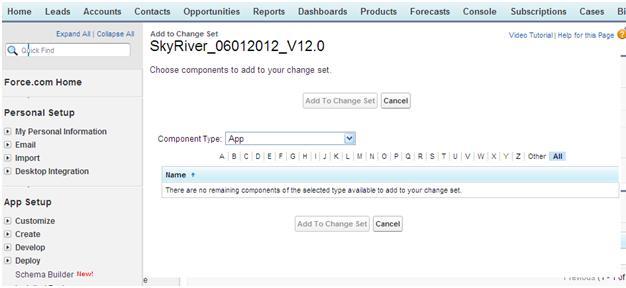
5)Here I am adding Caseesctrigger by selecting checkbox and then click on “Add To Change Set” button to add components to changeset.

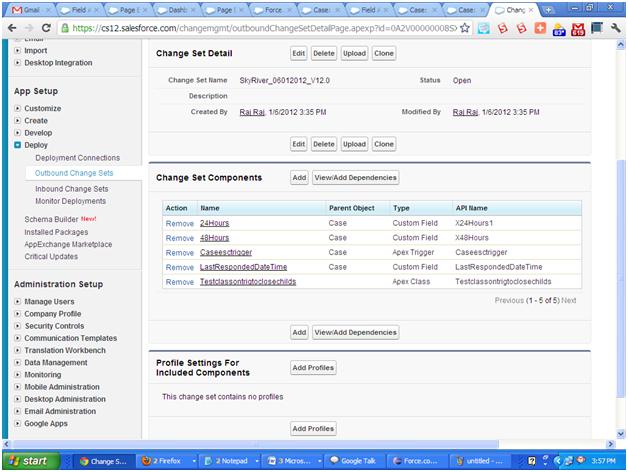
6)After adding all components we need the the window displayed as below with selected components
.
7)After creating change set you need to Click on “Upload” button to upload to production.

8)Then select the ‘Radio button’ and click on “Upload” button.


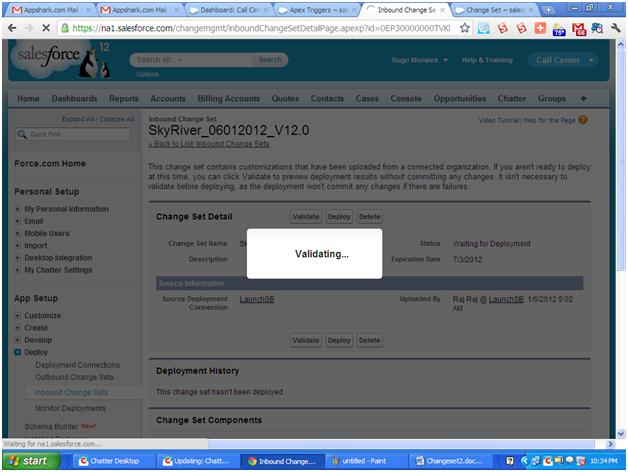
9)Now open the Production Login through UserMenu->setup->Appsetup->Deploy->Inbound Changesets. Then click on “change set name “you got from sandbox

.
10)Now click on “Validate” button

11)Then the following window is displayed as shown below.

12)Click On ‘OK’.
13)After validation succeeded then you need to click on “Deploy” button then the following window is displayed.

14)Now Click on “Ok” then the following window displayed

15)If the deployment is succeded then the following window is displayed as shown below.

All The Best.
No comments:
Post a Comment